When it comes to calligraphy, the right pen can take your lettering from simple to stunning. In this blog, we’ll break down the different types of calligraphy pens, what makes each one special, and how to choose the right one for your style.
What is a calligraphy pen?
Calligraphy pens come in all shapes and styles—fountain pens, dip pens, brush pens—you name it. Each one works a little differently and gives a unique feel to your lettering. Knowing what sets them apart can help you find the right fit for your creative flow.
What are Fountain Pens?
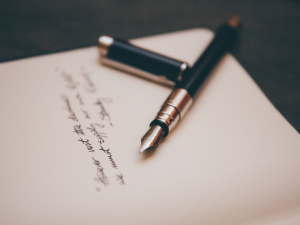
Fountain pens are like the classy older sibling of the pen world. They have a metal nib that glides smoothly across the page and use refillable ink cartridges, giving them a more sustainable edge. What makes them special? You can get beautiful line variation and shading just from the way you write. If you love a touch of elegance in your journaling or note-taking, a fountain pen might just become your new favourite tool.
This resource by The Pen Addict is hailed as one of the best for beginners diving into the world of fountain pens.
What are Dip pens?

Dip pens are as old-school as it gets—in the best way. They’re made up of a nib and a holder, and unlike fountain pens, there’s no ink cartridge inside. You simply dip the nib into a bottle of ink, and you’re good to go. It’s a bit more hands-on, but that’s what makes them so fun and personal. Dip pens give you loads of control over line style and let you experiment with different inks. While they’re not the most convenient option, they’re perfect if you’re after an authentic, artistic feel in your calligraphy or illustration work.
If you’re seeking more information on dip pens, this beginner guide from the pen company is the perfect resource for you.
What are Brush Pens?

Brush pens are a popular tool in modern calligraphy and hand lettering, loved for their flexibility and ease of use. Instead of a rigid nib, they have a soft, brush-like tip that creates beautiful, expressive strokes—perfect for everything from casual doodles to detailed calligraphy work. Whether you’re a beginner learning calligraphy or an experienced lettering artist, brush pens offer great control over line thickness with just a change in pressure. Available in both disposable and refillable options, they’re a mess-free alternative to traditional dip pens and ink. If you’re into bullet journaling, sketching, coloring, or modern brush lettering, brush pens are a must-have in your creative toolkit.
One of my favourite resources: Jake Rainis’ blog is the go-to guide for everything you need to know about brush pens.
How to Use a Calligraphy Pen
Embarking on a calligraphic journey requires mastering the art of using a calligraphy pen. Whether you’re a novice or an experienced hand, our guide will help you choose the right pen, set it up for first-time use, and master essential calligraphy strokes.
Choosing the Right Pen for Your Style:
How do I choose the right Fountain Pen for calligraphy?
1. Nib Flexibility
If you’re getting into calligraphy with fountain pens, a flexible nib is a game-changer. It responds to pressure, giving you beautiful line variation—from thin upstrokes to bold downstrokes. This kind of control is perfect for modern calligraphy styles.
2. Ink Compatibility
Not all fountain pens are created equal when it comes to ink. Look for pens that are compatible with a range of calligraphy inks, especially if you plan to explore bottled inks or use a converter. Having that versatility can really expand your creative options.
3. Grip and Comfort
Calligraphy often means long, focused writing sessions, so comfort matters. Choose a fountain pen with a comfortable grip that feels natural in your hand. A good ergonomic design will help you write smoothly without fatigue.
How do I choose the right Dip Pen for calligraphy?
1. Try Different Nibs
One of the best parts about using a dip pen for calligraphy is the variety of nibs you can explore. Each nib creates a unique line quality, letting you experiment with different calligraphy styles—from fine, delicate strokes to bold, dramatic ones. A personal favorite? The Hunt 101 nib—perfect for thin writing and beautiful on hand-lettered cards and envelopes.
2. Consider an Oblique Calligraphy Pen
If you’re working on pointed pen scripts like Copperplate or Spencerian, an oblique calligraphy pen can make a big difference. The angled holder helps align your hand more naturally, giving you better control and smoother strokes. It may look fancy, but this type of dip pen holder is a go-to for many modern calligraphers.
3. Look for Nib Customization Options
Some dip pens make it easy to swap out nibs, which is great if you’re working on a range of calligraphy projects. Having the option to replace and customize your nibs means you can tailor your tools to your personal lettering style.
4. Ink Compatibility
Like fountain pens, dip pens work best when paired with the right ink. Make sure your dip pen is compatible with a range of calligraphy inks so you can play with different textures, finishes, and colors. The right ink can completely transform your lettering!
How do I choose the right Brush Pen for calligraphy?
Brush Tip Flexibility: Experiment with different brush pen tips to find the right level of flexibility. A brush pen with a responsive and adaptable tip allows you to create diverse strokes, essential for calligraphy styles.
My go-to favourite is the Tombow Fudenosuke brush pens. They are perfect for lettering headings, bullet journals, making cards, and more!
Ink Flow Control: Select a brush pen with good ink flow control. Consistent ink flow ensures smooth writing and prevents disruptions in your lettering. This is particularly important when working on intricate calligraphy projects.
Remember, personal preference plays a significant role in choosing the right pen for calligraphy, so don’t hesitate to try out different options until you find the perfect match for your unique style.
Practice Tips for Beginners

1. Start with Basic Strokes
Before diving into full alphabets, build your muscle memory by practicing fundamental calligraphy strokes and shapes. These basic strokes are the building blocks of modern calligraphy and will help you develop better control.
2. Light on the Upstrokes
Use a gentle hand when making upward strokes. This creates those signature thin lines in brush lettering and helps you build consistency in pressure and movement.
3. Press for the Downstrokes
Add more pressure on your downward strokes to create thicker lines. The contrast between thick and thin strokes is what gives modern calligraphy its unique style—so focus on smooth transitions and even pressure.
4. Focus on Consistency
Uniform downstrokes are key to clean, beautiful calligraphy. Try to match your stroke thickness and spacing for a more polished, cohesive look.
5. Play with Pen Holds
There’s no one-size-fits-all when it comes to holding your calligraphy pen. Try out different grips and angles to find what feels most natural and gives you the best control.
6. Start with Affordable Materials
You don’t need fancy tools to begin your lettering journey. Start with printer paper and budget-friendly brush pens like Crayola Super Tips—one of my all-time favourites for getting started. This way, you can explore hand lettering without the pressure of investing in expensive supplies.
7. Practice, Practice, Practice
Calligraphy is all about regular practice. Whether you’re at your desk, watching TV, or out and about, grab a pen and notepad whenever you can. A little bit of daily practice goes a long way!
If you’re looking for a great Brush Lettering Tutorial 101, one of my favorites is Max’s guide from Lettering Daily.
Let’s dive into Brush Pens:

At the beginning of my calligraphy journey, I focused on honing my skills by practicing the alphabet (A-Z) exclusively with a brush pen, and here are some valuable tips I’ve picked up along the way. Included below is a video of how I practice my A-Zs using brush pens.